


The Ultimate Guide To Custom Cabinet Process
Oct 27, 2026
Leave a message
Most guides to custom cabinets tell you the same things: "consult a designer, measure your space, choose a style." That's the version written for people who have never set foot in a factory floor. If you're actually planning a custom kitchen-and want to avoid the mistakes that only show up after installation-here are the steps that matter, from a cabinet maker's perspective.
The real process doesn't start with a colour swatch. It starts with layout. And it doesn't end with a nice render-it ends with knowing exactly what's inside the box.
Layout First, Everything Else Second

Before you fall in love with a door style, decide how the kitchen will actually work. Layout determines cabinet sizes, appliance placement, and how much storage you'll have-no finish or hardware can fix a bad layout.
What we consider:
- The work triangle (sink–cooktop–fridge) still matters, but in an open-plan home, zone-based layouts often work better: a wet zone, a fire zone, a prep zone
- Walkway width: 1000–1200mm is ideal for single cooks; 1200–1500mm if two people cook together
- Door swing vs. drawer access: A wall of drawers needs less clearance than a wall of hinged doors-this affects layout in tight spaces
- Appliance clearances: A fridge door may need 90° or 110° swing clearance; a dishwasher needs space to drop its door
Common industry mistake: Clients sign off on a layout that looks great on a 2D drawing but doesn't account for how doors and drawers actually open. A good designer will show you the swing paths.
Cabinet Structure - The Choice That Affects Everything
This is where industry knowledge matters most. Your cabinet's structural system determines durability, available interior space, and how it looks over time. Two main options exist: framed and frameless (also called full-access or European-style).
- Framed construction: A face frame sits across the front of the cabinet box. The doors overlap the frame. It's traditional, structurally solid, and hides small imperfections at the cabinet openings. But the frame eats about 10–15mm of access space per opening-drawers and shelves are slightly narrower.
- Frameless construction: No face frame. The door or drawer front covers the entire box edge. You gain full interior access-every millimetre counts. It's the standard for modern European kitchens and looks cleaner with wide drawers and handleless designs.
What no one tells you: A framed cabinet from one factory can be stronger than a frameless from another-or vice versa. It's not the type that matters most; it's the material and assembly quality. A frameless cabinet with a thick, well-joined box will outperform a poorly made framed one every time.

Box material matters just as much:
- Particleboard (chipboard): Most common. Light, stable, cheap-but fails fast in moisture. Fine for dry areas, risky near sinks and dishwashers.
- MDF: Denser, smoother for painted finishes, but heavier and susceptible to swelling if water penetrates.
- Plywood: The gold standard for wet zones and high-load drawers. Holds screws better, resists moisture far better, and doesn't crumble when water gets in. More expensive, but the choice for long-term durability.

Particleboard

MDF

Plywood
Door Styles - The Surface, Not the Substance
Door style is what people notice first, but it's mostly cosmetic. Still, there are insider details worth knowing:
Slab (flat panel): The cleanest look. But be aware: a slab door shows every imperfection in the substrate. Cheap boards can telegraph texture through thin laminate or paint. High-quality substrates and finishes are non-negotiable here.
Shaker: The most popular style for good reason-it hides minor surface imperfections and suits almost any interior. But shaker quality varies enormously. Look at the inner corner: cheap shaker doors have visible gaps or sloppy glue joints. Good ones are tight, square, and consistent.
Handleless/J-pull: Sleek, but demands precision. A J-pull is machined directly into the door-any error in depth or angle is immediately visible and unrepairable. Only factories with reliable CNC equipment can do this well.
One insider tip: Ask how the door is made. A solid wood frame with an MDF centre panel will move differently than an all-MDF door or an engineered timber door. In humid climates, that matters more than the style itself.


Materials, Colour, and Surface Finish - The Layer That Takes the Abuse
This is where most buyers overspend or underspend-usually on the wrong thing.
The finish is not the same as the material. You can have an MDF door with a melamine finish, a particleboard door with PET, or a plywood core with a wood veneer. Each layer serves a different purpose.
What industry professionals consider:
- Melamine: Durable, economical, wide colour range. But the edge banding is the weak point. Poor edge quality lets moisture in-especially near sinks. Specify PUR edge banding if available.
- PET: Excellent scratch resistance, anti-fingerprint options, and a premium feel. Matte PET hides fingerprints better than gloss. A good choice for high-traffic kitchens.
- Lacquered (painted): Beautiful depth and colour. But paint chips. Not if-when. Joints crack as wood expands and contracts. Painted cabinets require touch-ups; this is normal, not a defect. Choose this if you accept the maintenance.
- Wood Veneer: Real timber surface. Beautiful and warm. But it needs a protective topcoat and performs best in climates with stable humidity.
- Thermofoil (PVC film): Budget-friendly and seamless in simple shapes. But it can peel in high heat-avoid directly above ovens and cooktops.
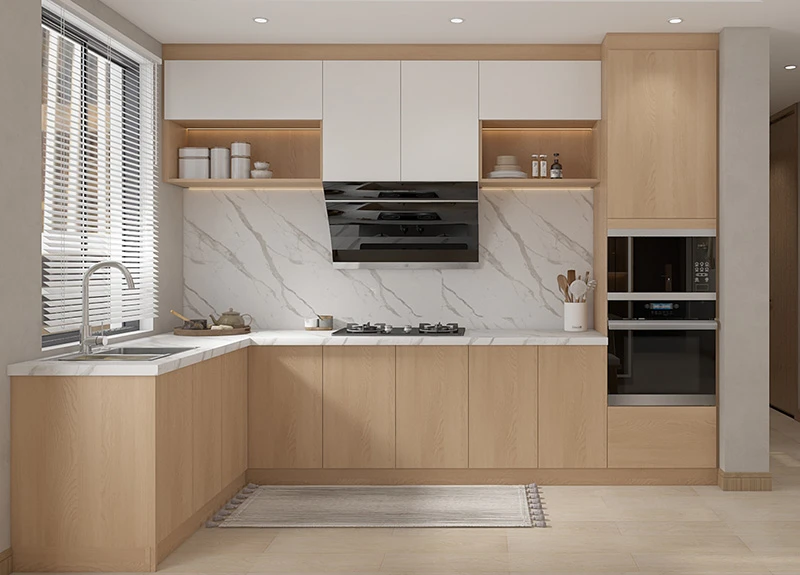

Colour and finish insider advice:
- Matte finishes hide scratches and fingerprints; gloss shows everything. If your kitchen gets heavy daily use and you have young children, matte is the practical choice.
- Dark colours show dust. If you hate wiping down cabinets every week, choose mid-tones or light neutrals.
- Textured finishes hide more than smooth ones. Wood grain textures, stone textures, and fine linear patterns camouflage everyday wear far better than flat surfaces.
- Edge banding must match. The best colour in the world looks cheap if the edge banding is visibly different. Ask to see an edge sample, not just a door face sample.
Hardware - The Jewellery of the Cabinet
Hardware is where a good cabinet becomes a great one-or where a beautiful cabinet starts falling apart in year three.
Hinges: Look for brands like Blum, Hettich, or Hafele. They're tested for 100,000+ cycles. A quality hinge has integrated soft-close and three-way adjustment (height, side, depth). Cheap hinges squeak, sag, and lose adjustment within a year.


Drawer Slides:
- Undermount slides (hidden beneath the drawer): Smoothest, quietest, full access. The standard for premium kitchens.
- Side-mount slides: Visible, less smooth, narrower access-but cheaper.
- Heavy-duty runner systems (for deep pan drawers): Necessary for cast iron and stacked dishes.
Insider tip: Even Blum makes different grades. Ask for the specific model-the bottom of the Blum range is still good, but not the same as their premium series.
A note on handleless designs: They look minimalist, but the mechanism matters. Push-to-open catches fail over time. Magnetic push-latches are more reliable. Integrated J-pulls or profile handles are the most durable option-but require precise manufacturing.
Function First - The Accessories That Make or Break Daily Use
A beautiful cabinet that's annoying to use is a failed cabinet. This is where custom really pays off-you can specify exactly what goes inside.
Worth the investment:
- Corner solutions: A blind corner without a pull-out system is a black hole. LeMans-style pull-outs or rotating carousels transform dead space into usable storage.
- Deep drawer organisers: Adjustable dividers for pots, lids, and pans. A deep drawer full of chaos is no better than a shelf.
- Pull-out waste bins: Keeps rubbish hidden, keeps the floor clear.
- Cutlery and utensil inserts: Simple but effective. Custom-cut inserts are far better than universal plastic trays.
- Pull-out spice racks: Especially useful in narrow gaps beside the fridge or range.


What's usually not worth it:
- Elaborate internal lighting inside closed drawers (you'll rarely open them in the dark)
- Motorised opening systems (a reliable push-latch is simpler and cheaper to maintain)
- Overly complex cutlery dividers with too many small compartments (they become hard to clean)
The insider rule: Prioritise the accessories you interact with multiple times a day-drawer organisers, corner pull-outs, bin systems. Skip the gimmicks you'll use twice a year.
Set a Realistic Budget - And Know Where to Spend
Budget is not about choosing the cheapest or most expensive option. It's about allocating money where it makes a daily difference.
Where to spend:
- Hardware: Hinges and slides are used every single day. This is the best value-for-money upgrade in any kitchen.
- Drawers over doors: A kitchen with more drawers costs more upfront but is dramatically more usable. If budget forces a compromise, skip the fancy backsplash and add drawers instead.
- Corner mechanisms: They convert unusable space into storage. The return on investment is immediate.
Where to save:
- Upper cabinet interiors: Basic shelving is fine-you don't need complex organisers for occasional-use items.
- Decorative end panels: Unless they're visible, standard panels work perfectly well.
- Handleless mechanisms: A simple, well-made J-pull is cheaper and more durable than motorised opening systems.
The quote trap: A low quote may exclude edge banding upgrades, delivery or even drawer slides. Always compare itemised specifications, not just the final number. Ask specifically: "Is the quoted price for plywood or particleboard? What hardware brand and model? Is installation included?"
One Last Thought
Custom cabinets are a significant investment. The difference between a good outcome and a frustrating one usually isn't the colour you choose-it's the structural decisions you make before colour even enters the conversation.
If you're planning a custom kitchen, we're happy to walk you through these steps with your specific space and needs. No pressure-just clear, practical answers from people who build cabinets every day.